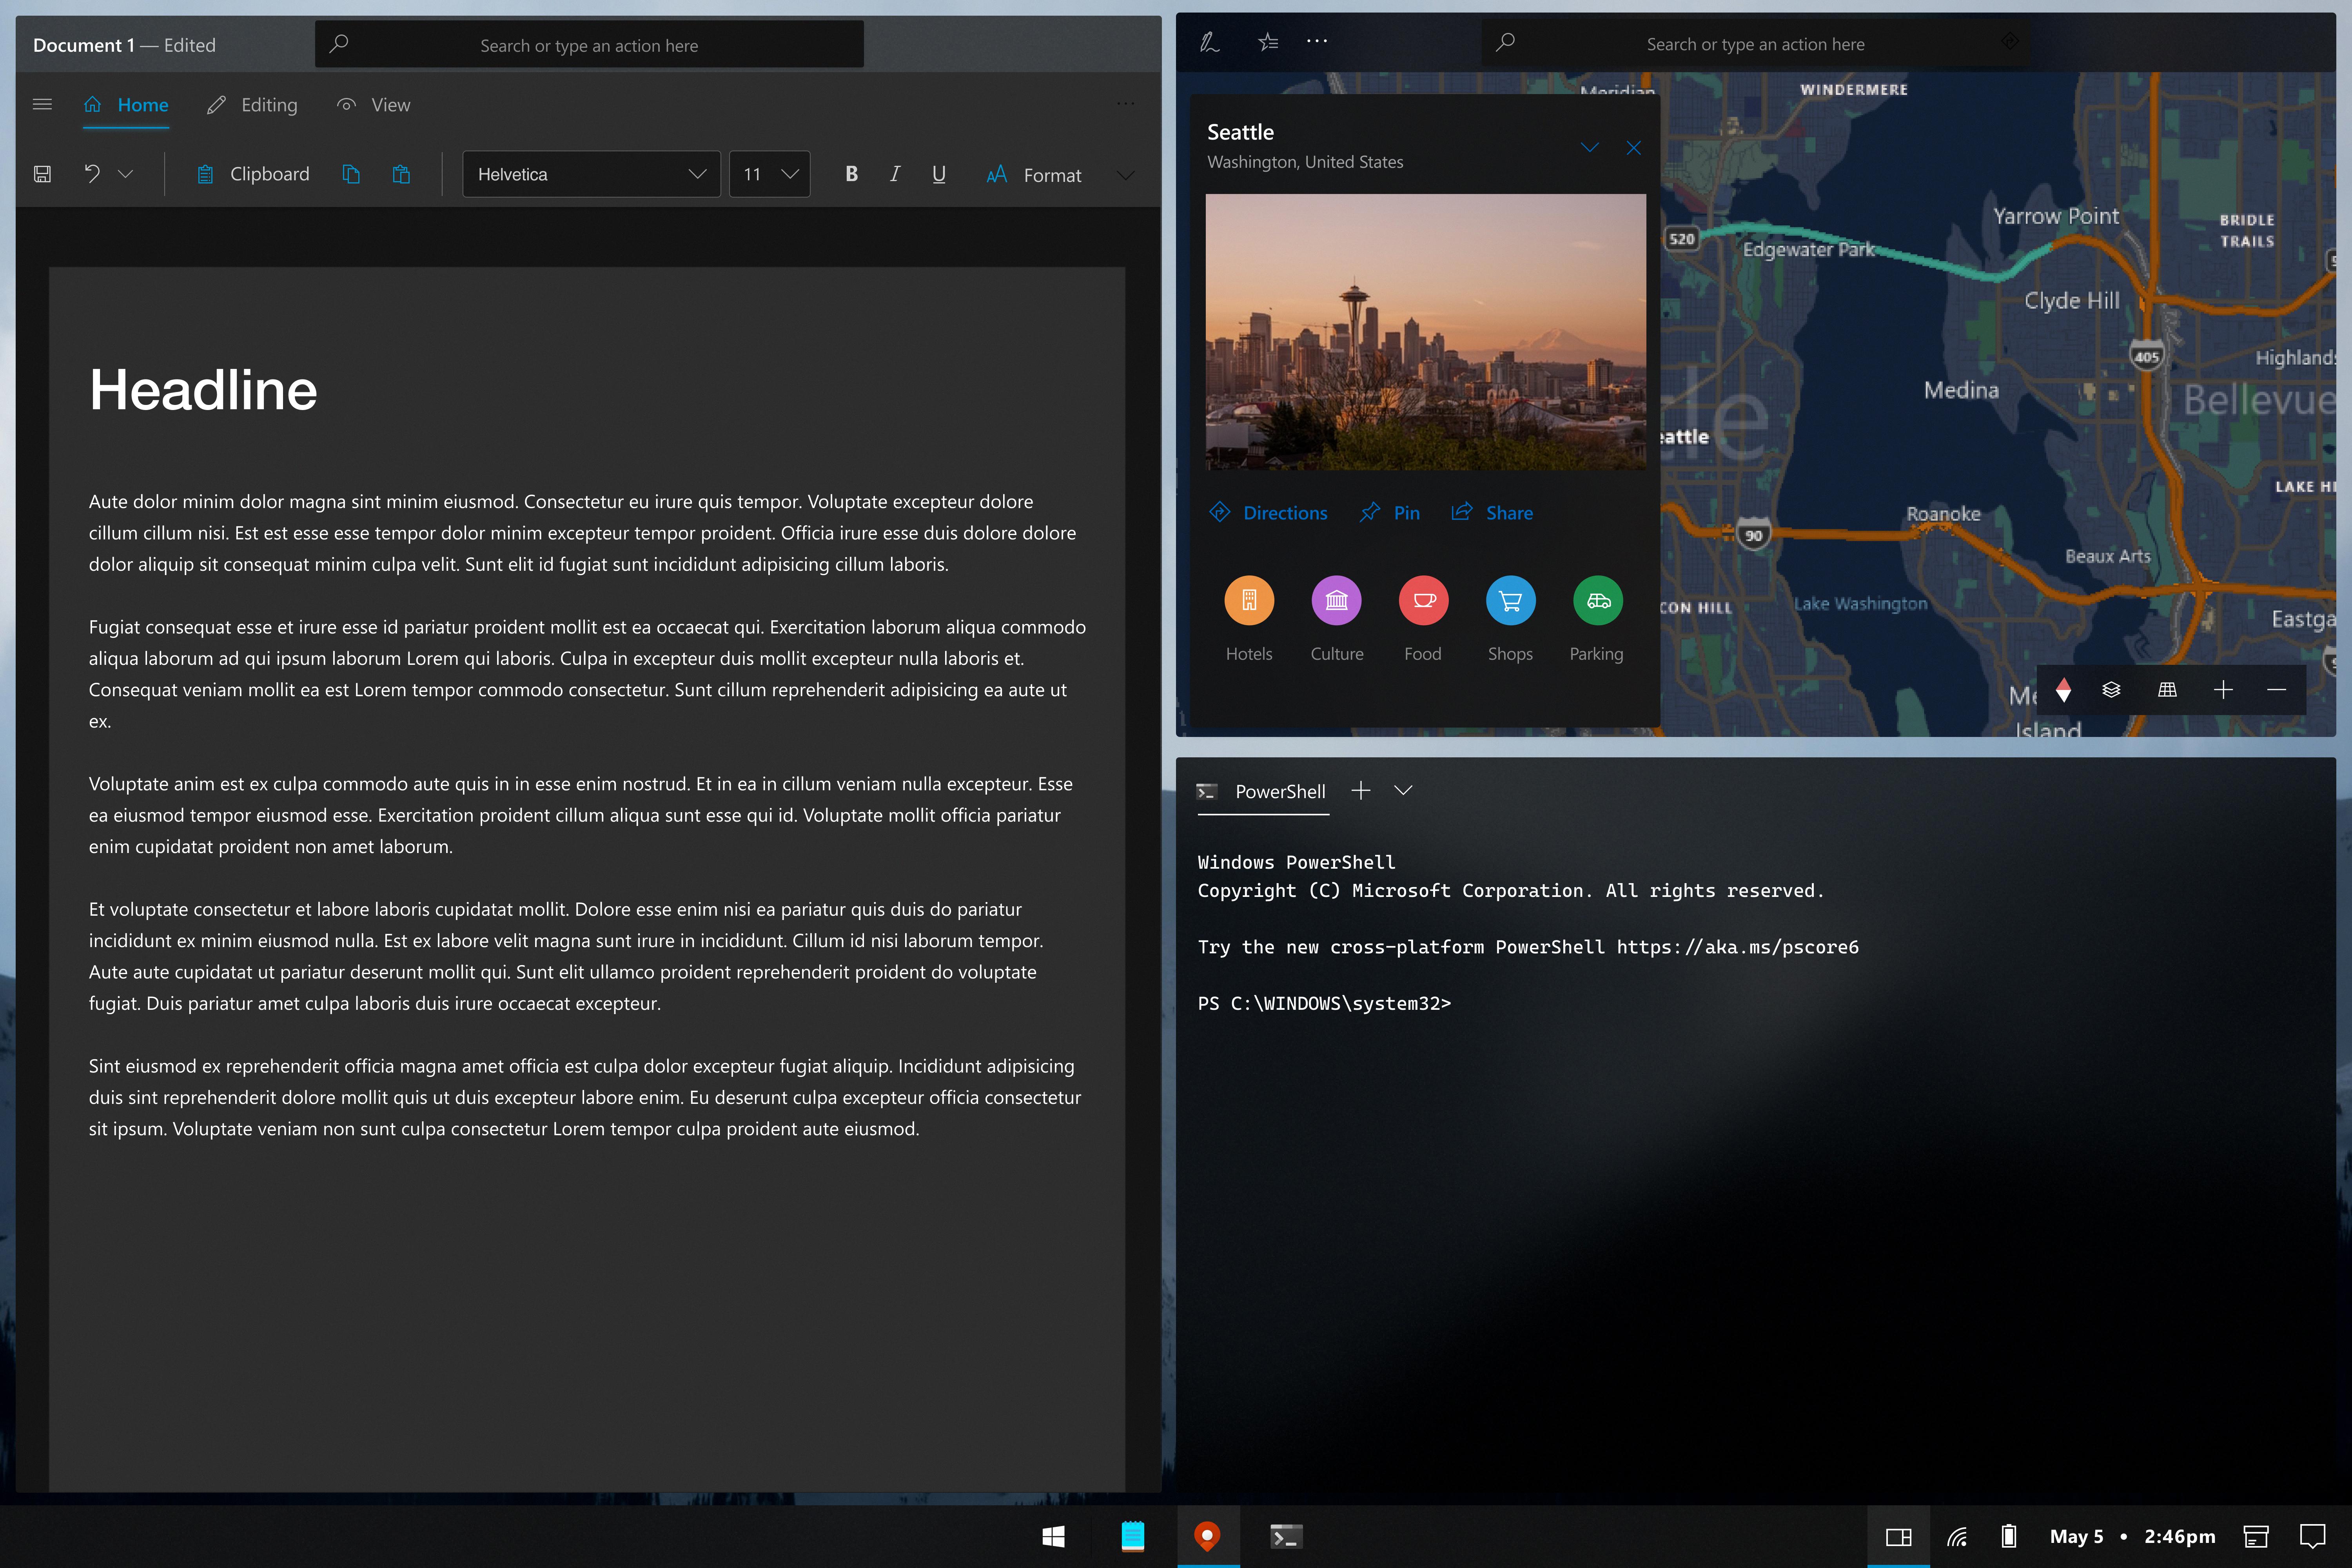
In Windows 10, tile windows offer a convenient way to organize and manage your applications and tasks. Whether you’re a multitasker or simply prefer a well-organized desktop, understanding how to move, resize, add, and remove tiles from the Start menu can greatly enhance your Windows experience.
To begin, let’s explore how to position windows side by side using the snap feature. This allows you to easily view and work with multiple applications simultaneously. To snap a window to one side of the screen, press and hold the Windows key and the Left Alt key, then press the Up Arrow key. This will position the window on the left half of the screen and prompt you to select another window to occupy the right half.
Once you have two windows snapped side by side, you can adjust their sizes by dragging the vertical divider between them. This allows you to allocate more or less space to each window, depending on your preferences and needs. Additionally, you can resize a snapped window by clicking and dragging its edges or corners.
If you want to add tiles to your Start menu, simply locate the application you want to add, right-click on it, and select “Pin to Start.” This will place the tile on the right side of the Start menu, allowing you quick access to your favorite apps.
On the other hand, if you wish to remove a tile from the Start menu, right-click on it and choose “Unpin from Start.” This will remove the tile, but keep the application installed on your system. You can also resize and rearrange the tiles on the Start menu by clicking and dragging them to your desired position.
In addition to managing tiles on the Start menu, Windows 10 also offers the ability to create virtual desktops. This feature allows you to have multiple desktops with different sets of open windows and applications. To create a virtual desktop, click on the Task View button on the taskbar (located next to the search bar) or press the Windows key + Tab. From there, you can click on the “New Desktop” button to create a new virtual desktop.
Once you have multiple virtual desktops, you can switch between them by clicking on the Task View button and selecting the desired desktop. This can be particularly useful if you want to group related applications or tasks together, creating a more organized and focused workspace.
Windows 10 provides a range of options for managing and organizing your windows and applications. By utilizing the snap feature, adding and removing tiles from the Start menu, and creating virtual desktops, you can customize your Windows experience to suit your workflow and preferences. So go ahead and take control of your windows with these helpful tips and tricks in Windows 10.
How Do I Tile Multiple Windows In Windows 10?
To tile multiple windows in Windows 10, you can utilize a keyboard shortcut in combination with the mouse. Here’s a step-by-step guide on how to do it:
1. Open the first window that you want to tile.
2. Hold down the Microsoft Key (also known as the Windows key) and the Left Alt Key simultaneously.
3. While keeping those keys pressed, tap the Up Arrow Key once.
Following these steps will position the first window into the first half of the screen, occupying exactly half of the display.
4. After performing the above steps, Windows 10 will prompt you to select the second window that you want to place in the second half of the screen.
To select the second window, move your mouse cursor to the desired window and click on it. The selected window will automatically snap to the second half of the screen, creating a side-by-side tiling effect.
By tiling windows in this manner, you can effectively multitask and work on two different applications simultaneously, allowing for enhanced productivity and efficiency.
It’s worth mentioning that you can also tile multiple windows by using the Snap Assist feature in Windows 10. Simply drag and drop windows to the sides or corners of the screen to achieve various tiling configurations.
In summary, to tile multiple windows in Windows 10, use the keyboard shortcut Microsoft Key + Left Alt Key + Up Arrow Key to position the first window in the first half of the screen, and then select the second window to snap it to the second half of the screen.

How Do I Tile In Windows 10?
To tile in Windows 10, you can easily move, resize, add, and remove tiles from your Start menu. Here’s how you can control everything with your tiles:
1. Start by pressing the Windows key on your keyboard or clicking on the Windows icon in the bottom left corner of your desktop. This will open the Start menu.
2. To move a tile, simply click and hold on the tile you want to move, then drag it to the desired position on the Start menu. Release the mouse button to place the tile in its new position.
3. If you want to resize a tile, right-click on the tile and select the “Resize” option from the context menu. You can then choose from the available size options: small, medium, wide, or large. Select the desired size and the tile will adjust accordingly.
4. To add a new tile to the Start menu, you can either right-click on an app in the list of All Apps and select “Pin to Start,” or you can drag and drop an app from the list of All Apps directly onto the Start menu. The app will be added as a new tile.
5. If you want to remove a tile from the Start menu, simply right-click on the tile and select “Unpin from Start.” The tile will be removed from the Start menu, but the app will still be accessible from the list of All Apps.
6. You can also create tile groups on the Start menu to organize your tiles. To do this, simply drag and drop a tile onto another tile. This will create a group with both tiles. You can then drag and drop more tiles onto the group to add them.
By following these steps, you can easily tile your Start menu in Windows 10, customize the layout, and make it more organized and convenient for your needs.
Is There A Tiling Window Manager For Windows 10?
There is a tiling window manager available for Windows 10 called FancyWM. FancyWM is a dynamic tiling window manager that allows users to create dynamic tiling layouts using either the mouse or keyboard. It provides a range of features to enhance window management on Windows 10.
Here are some key features of FancyWM:
1. Dynamic Tiling Layouts: FancyWM allows users to create dynamic tiling layouts by automatically arranging windows based on user-defined rules. This means that windows can be resized and moved around automatically to fit the available screen space.
2. Keyboard and Mouse Control: Users can control FancyWM using both the keyboard and mouse. Window focus can be easily moved using keyboard shortcuts, and windows can be swapped and resized using keyboard commands. Additionally, windows can be swapped by holding the [⇧ Shift] key while dragging with the mouse.
3. Panels: FancyWM supports horizontal and vertical panels, allowing users to display additional information or widgets on the screen. Panels can be customized to show various system information, such as time, date, weather, or system performance.
4. Stack Panels: In addition to horizontal and vertical panels, FancyWM also supports stack panels. Stack panels allow users to stack windows on top of each other, making it easy to switch between different applications or documents.
5. Customization: FancyWM is highly customizable, allowing users to personalize their window management experience. Users can configure various settings, such as window borders, colors, and hotkeys, to suit their preferences.
FancyWM is a powerful tiling window manager for Windows 10 that offers a range of features to enhance window management. Whether you prefer to control windows using the keyboard or mouse, FancyWM provides the flexibility and customization options to create an efficient and organized workspace.
Conclusion
Tile windows in Windows 10 provide a convenient and efficient way to organize and manage your open applications and programs. With the ability to resize, move, add, and remove tiles from the Start menu, you have full control over how your desktop is arranged.
By using the Microsoft Key + Left Alt Key + Up Arrow Key shortcut, you can easily position a window into the first half of the screen and select another window to place in the second half. This allows for side-by-side multitasking and makes it easier to work with multiple applications simultaneously.
Additionally, if you prefer a more dynamic and customizable experience, you can explore third-party options like FancyWM. This dynamic tiling window manager offers features such as creating dynamic layouts with mouse or keyboard, moving window focus with keyboard shortcuts, swapping windows, resizing windows, and more.
Whether you choose to use the built-in tile windows functionality in Windows 10 or opt for a third-party solution, the goal is to enhance your productivity and streamline your workflow. With tile windows, you can easily organize and access your applications, making multitasking a breeze.
Tile windows in Windows 10 provide a flexible and user-friendly way to manage your desktop, allowing you to work more efficiently and effectively. So, take advantage of these features and customize your Start menu to suit your needs and preferences.


