Group text messaging can be a convenient and efficient way to communicate with multiple people at once. Whether you’re planning a get-together with friends, coordinating a work project, or simply staying in touch with a large group, setting up a group text on your Android phone is a simple process. In this article, we will guide you through the steps to create a contact group and set up group text messaging on your Android device.
To get started, open the Contacts app on your Android phone. Once you’re in the app, tap on the Groups tab. This will show you a list of any existing contact groups you may have. If you don’t have any groups yet, don’t worry, we’ll show you how to create one.
To create a new contact group, tap on the “ADD” button located towards the upper right corner of your screen. A new window will appear where you can name your group. Choose a descriptive name that reflects the purpose or the people included in the group. Once you’ve entered the name, tap on the “Save” button.
Now that you have a contact group set up, it’s time to add contacts to it. To do this, tap on the “ADD” option near the top right corner of your screen. This will open your contacts list. Scroll through your contacts and tap to select the desired contacts you want to add to the group. You can select multiple contacts by tapping on each one individually. Once you’ve selected all the contacts you want to add, tap on the “Done” button.
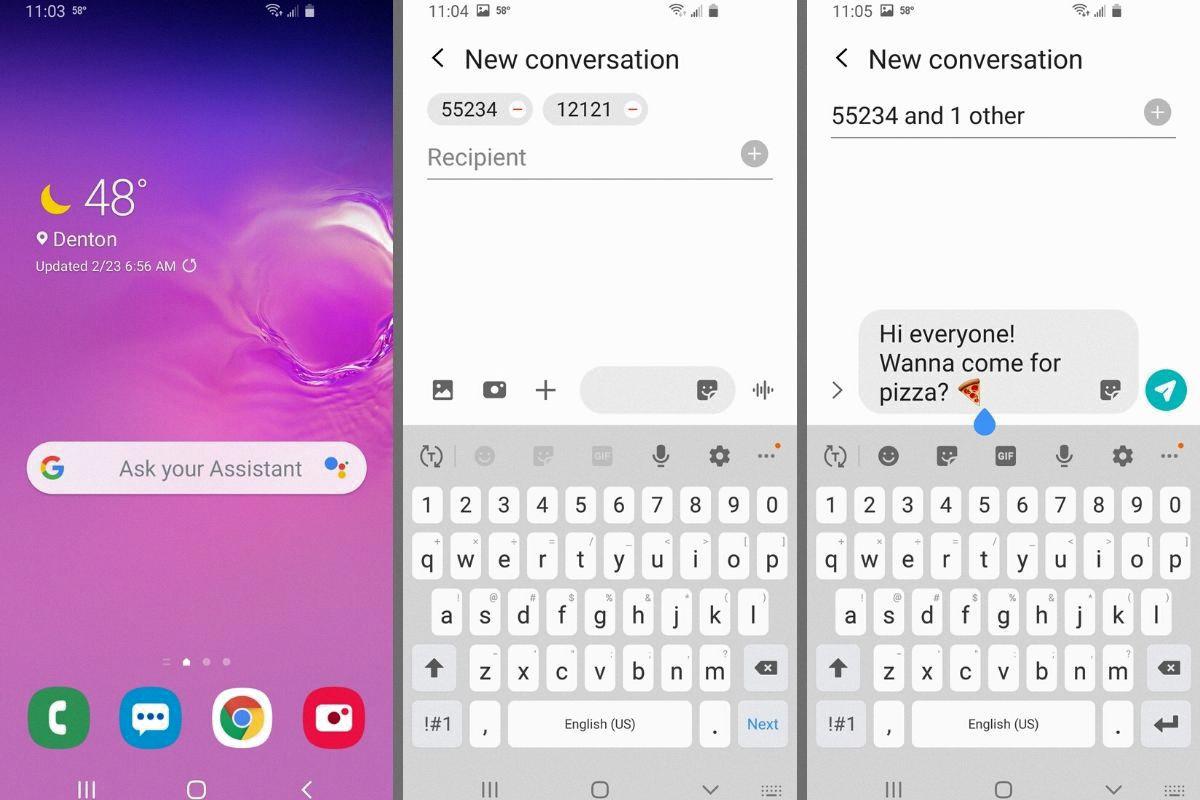
Now that you have your contact group ready, you can start sending group text messages. Open your messaging app and create a new message. In the recipient field, start typing the name of your contact group. As you type, the group name should appear as an option. Tap on it to select the entire group as the recipient of your message.
Alternatively, you can also create a group text message from an existing conversation. Open a conversation with one of the contacts you added to the group. Tap on the menu icon, usually represented by three dots or lines, located in the top right corner of the screen. From the menu options, tap on the pencil icon to edit the conversation. In the conversation settings, you can name the group and even add some emojis if you like.
It’s important to note that the steps to set up group text messaging may vary slightly depending on the messaging app you are using. However, the general process should be similar across different Android devices.
Setting up a group text on your Android phone is a straightforward process. By creating a contact group and selecting the desired contacts, you can easily send group text messages to multiple people at once. Group text messaging can be a convenient way to stay connected and communicate efficiently with a large group of people.
How Do I Create A Contact Group For Texting?
To create a contact group for texting on your Android phone, follow these steps:
1. Open the Contacts app on your Android device. This app is usually represented by an icon that looks like a person’s silhouette.
2. Once you’re in the Contacts app, locate and tap on the “Groups” tab. This tab is typically located at the top or bottom of the screen.
3. On the Groups screen, you should see an option to add a new group. Look for a button or icon labeled “ADD” or something similar, usually located in the upper right corner of the screen. Tap on it.
4. A dialogue box will appear asking you to name your contact group. Enter a descriptive name for your group, such as “Family,” “Friends,” or “Colleagues.” Once you’ve named the group, tap on the “Save” button.
5. After saving the group, you will be taken back to the Groups screen. Now, tap on the “ADD” option near the top right corner of your screen. This will allow you to add contacts to your newly created group.
6. On the Add Contacts screen, you’ll see a list of your contacts. Tap on the names of the contacts you want to add to the group. As you select contacts, you may see checkmarks or indicators next to their names. Once you’ve selected all the desired contacts, tap on the “Done” button, usually located in the top right corner of the screen.
7. Your selected contacts will now be added to the contact group you created. You can repeat steps 5 and 6 to add more contacts to the group if needed.
Now, when you want to send a text message to the entire group, you can simply select the group name instead of individually selecting each contact. This makes it convenient and efficient for sending messages to multiple people at once.
Note: The exact steps may vary slightly depending on the version of Android and the Contacts app you have on your device. However, the general process should be similar.
Can You Name A Group Text On Android?
To name a group text on Android, follow these steps:
1. Open your messaging app and go to the group conversation you want to name.
2. Look for the menu icon, usually represented by three dots or lines, and tap on it.
3. In the menu options, locate and tap on the pencil icon. This usually indicates the option to edit or rename the group.
4. A text field should appear where you can enter the desired name for the group. Be as creative as you like!
5. If you want to add some personality to the group name, you can include emojis. Simply tap on the emoji icon or search for specific ones to enhance the group’s identity.
6. After entering the group name and emojis, tap on the save or confirm button to finalize the changes.
By following these steps, you can easily name your group text on Android and make it more distinctive and memorable.
Why Can’t I Group Text With Android?
When it comes to group texting, Android devices may have some limitations. One reason why you may not be able to group text on your Android device is due to the messaging app settings. In some cases, the option for group messaging may not be readily available in the main settings menu. However, it can usually be found within the SMS or MMS settings.
To access the group messaging settings on your Android device, start by opening your messaging app. Look for the menu icon or menu key, typically located at the bottom of the screen. Tap on it to open the menu options. If you don’t see the group messaging option in the first menu, try looking for it in the SMS or MMS settings.
Once you locate the group messaging option, make sure it is enabled. Sometimes, this feature may be turned off by default, preventing you from sending group texts. By enabling it, you should be able to send messages to multiple recipients simultaneously.
It’s important to note that the availability and location of the group messaging settings may vary depending on your specific Android device and the messaging app you are using. Therefore, it’s recommended to consult your device’s user manual or refer to the support documentation provided by the messaging app to find the exact steps for enabling group texting on your device.
The inability to group text on your Android device might be due to the settings of your messaging app. By accessing the SMS or MMS settings, you should be able to enable the group messaging feature and send texts to multiple recipients simultaneously.
Conclusion
Creating a contact group on your Android phone can be a convenient and efficient way to manage your contacts and send group messages. By following the simple steps outlined above, you can easily create a contact group and add desired contacts to it. This allows you to easily send messages to multiple contacts at once, saving you time and effort. Additionally, you can personalize your group messages by giving them a name and adding emojis. utilizing contact groups can enhance your messaging experience on your Android phone, making it easier to stay connected with your friends, family, or colleagues.

