Macs have been the go-to choice for many creatives, from musicians to filmmakers. One of the great features of a Mac is its ability to easily edit, mix, and cut audio. Whether you’re a music producer or just someone who wants to trim an MP3 for personal use, cutting audio on a Mac is easy with the right tools.
For starters, you’ll need an audio editor. QuickTime Player is a great option for Mac users. It allows you to open any audio file and easily trim it using yellow sliders in the “Trim” menu. This will let you adjust the length of your MP3 file before saving it.
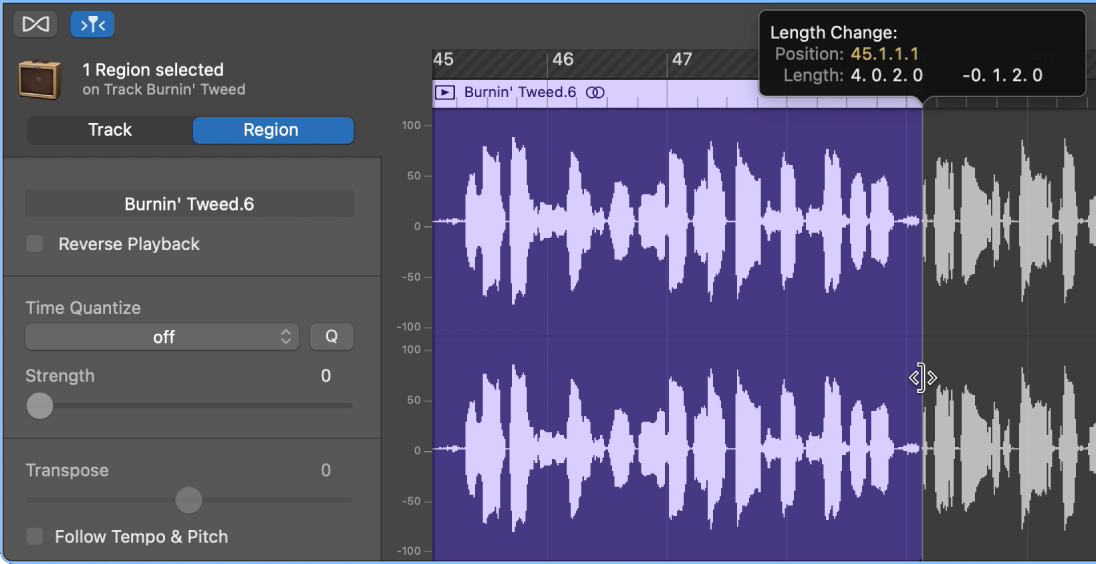
If you want more control over your audio editing, GarageBand is another great option. It has a range of powerful tools that let you do everything from fine-tuning your cuts to adding effects like reverb or compression. You can also use its visual Audio Timeline to trim your tracks by dragging left or right on either end of a green bar until the trim pointer appears.
Finally, there are several third-party apps available for those who prefer to work outside Apple’s ecosystem. MP3 Cutter is one such app that’s available from the Google Play store and lets you select an audio file from your list and move markers to define where the cut should be made. You can then play back your selection before saving it.
So whether you want to make minor adjustments or major edits, cutting audio on Mac is quick and easy with these helpful tools!

Cutting and Joining Songs on a Mac
To cut and join songs on a Mac, you can use Apple’s built-in QuickTime Player. First, open your audio file in QuickTime Player by right-clicking on the file and selecting “Open with” > “QuickTime Player.” Then select “Edit” > “Trim” from the menu bar to adjust the length of your MP3 file by moving the yellow sliders. You can click on the Play button to listen to the trimmed version before saving it.
To join two or more songs, select all of the audio files you want to join in Finder and open them with QuickTime Player. When they are all open, go back to Finder and select all of the audio files again. Then right-click and select “Services” > “Join Files…” In the resulting window, you can rearrange the order of your joined tracks by dragging them around if needed before clicking “Join.” Your resulting joined track will appear as a new file in Finder which you can play back using QuickTime Player or any other media player.
Editing Music Files on a Mac
Editing a music file on a Mac is easy and straightforward with the audio editor in GarageBand. To get started, open GarageBand and select the audio track you wish to edit. Next, double-click an audio region in the Tracks area, select an audio track, and click the Editors button in the control bar, or select an audio track and choose View > Show Editor. Once you have opened the Audio Editor, you will be presented with several tools for editing your music file. You can use the Audio Editor to trim, fade and split clips; adjust volume levels; add fades; apply effects; and more. When you have finished making your changes, simply save your work and enjoy your new musical masterpiece!
Exploring the Availability of a Cut Function for Mac
Yes, there is a Cut function for Mac. You can use the Command-X shortcut to cut an item, or you can select Edit > Cut from the menu bar. Alternatively, you can Control-click (or right-click) the item you selected, then choose Cut from the shortcut menu. When you cut an item, it will be removed from its original location and stored in your clipboard until you paste it elsewhere.
Trimming a Song on a Laptop
To trim a song on your laptop, you’ll need to first open the song in an audio editing software. Once the song is open, go to the Audio Tools tab and click on the Playback option. From there, you can click on the Trim Audio button to begin the trimming process. To determine where you want to make a cut in the song, you can use the Play and Pause buttons located in the Trim Audio box. When you’re ready, simply click on the Save button to save your trimmed version of the song.
Trimming Audio in QuickTime
To trim an audio file in QuickTime, open the audio file in the QuickTime Player application. Go to Edit/Trim in QuickTime Player. In the Trim window, set the start and end points for the clip using the yellow handles. The content that is highlighted in the yellow rectangle will be what’s included in your trimmed clip. When you’re finished, click on Trim to save your edited audio file.
Does Apple Offer a Music Editing Tool?
Yes, Apple has a powerful music editor called Logic Pro. Logic Pro is an advanced music production platform designed to turn your Mac into a professional recording studio. It’s capable of handling even the most demanding projects and offers a range of features for creating and arranging music in real-time, building beats and melodies swiftly, and editing audio with precision. It also comes with an extensive library of sounds and effects to get you started.
Editing MP3 Songs
Editing MP3 songs is a simple process. First, you will need to upload your MP3 audio files into an editor. This can be done by clicking the ‘Choose MP3 Files’ button. After uploading your MP3 file, you will be taken to an audio editor page where you can make any changes you wish to the track. You can adjust the volume, add effects, and even trim or cut sections of the song. Once you are satisfied with your changes, simply click on the ‘Export’ button and your edited MP3 file will be downloaded to your device.


