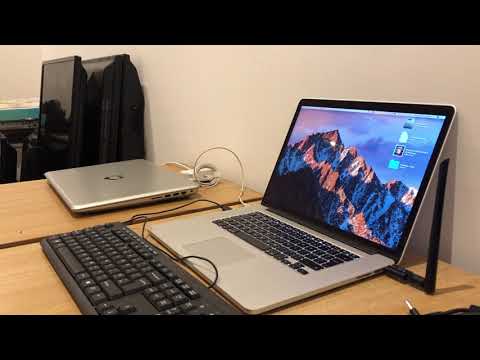
Are you looking to get the most out of your Macbook Pro? One of the best ways to do this is to connect an external keyboard. There are many reasons why you might want to do this, but the most common reason is convenience and portability. A good external keyboard will allow you to type faster and more accurately, as well as help to reduce strain on your wrists and fingers.
In this blog post, we’ll go through the steps for connecting a keyboard to your Macbook Pro. The process is relatively straightforward and should only take a few minutes.
First, make sure that Bluetooth is turned on in your Macbook Pro’s System Preferences. Once Bluetooth is enabled, open the Bluetooth preferences and make sure that your keyboard appears in the list of devices. If it doesn’t appear, try restarting your computer or unplugging and re-plugging in the receiver of your wireless keyboard.
Once you can see your keyboard in the list of devices, select it and click “Connect” (or “Pair”). You may be asked to enter a passcode; if so, enter this on the same keyboard that you are setting up. Then press Return on the same keyboard once more.
If you’re using a wireless Apple Keyboard with replaceable batteries, make sure that they are fresh before attempting to connect it to your Macbook Pro. If you have an Apple Magic Keyboard with a built-in battery (as in newer models), check that it is charged before trying to connect it. Also, make sure that you are using a different charging cable than what came with your device – if possible – as well as a different USB port on your Macbook Pro itself.
That’s all there is to it! Once these steps have been followed correctly, you should now be able to use an external keyboard with your Macbook Pro for convenient typing or gaming sessions!

Getting Mac to Recognize Keyboard
To get your Mac to recognize your keyboard, you will need to configure your system settings. First, open the Apple menu and select System Preferences. Then click Keyboard in the sidebar. You may need to scroll down to find it. Next, click the Edit button next to Input Sources on the right side of the window. This will enable a check box option for “Show Input Menu in Menu Bar”. Open the Input menu that appears in the top toolbar and make sure that the correct keyboard layout is selected. Once you have done this, your Mac should now recognize your keyboard.
Connecting a Wireless Keyboard to a Macbook
To connect a wireless keyboard to your Macbook, first, make sure the keyboard is in pairing mode. Then, go to the Apple menu. > System Preferences and click Bluetooth. Your device should appear in the list of available devices, so click Connect (or Pair). You may be asked to enter a passcode. If so, enter the passcode on the same keyboard that you are setting up and press Return. Once connected, your wireless keyboard should now be ready for use.
Troubleshooting Mac Keyboard Connection Issues
If your Mac keyboard isn’t connecting, it might be due to a few different reasons. First, make sure the cable is securely connected to both the keyboard and your Mac. If that doesn’t work, try a different USB port on your Mac, as some ports may be more sensitive than others. If you’re using a wireless keyboard, check the batteries or make sure it’s charged up if it has a built-in battery. Lastly, make sure Bluetooth is turned on and that your Mac is in range of the keyboard.
Troubleshooting Wireless Keyboard Connection on Macbook Pro
There are a few possible causes for your wireless keyboard not connecting to your Macbook Pro. First, make sure that the batteries in the keyboard are fresh and fully charged. If they are, check if your Macbook Pro is in range of the keyboard. Additionally, make sure that Bluetooth is enabled on your Macbook Pro and that the keyboard is paired with it correctly. If all of these steps have been done and the problem still persists, try resetting your SMC (System Management Controller) as this could be an issue with power management. Lastly, if none of these options seem to work, you may need to contact Apple Support for further assistance.
Getting a Computer to Recognize a Keyboard
To get your computer to recognize your keyboard, first, you’ll need to open Device Manager. Right-click on Start and select Device Manager. Then, expand the Keyboards by clicking the arrow next to it. Right-click on the affected keyboard and select Update driver. Lastly, select Search automatically for updated driver software in the pop-up window. This will prompt your computer to look for any available updates for your keyboard. If an update is found, it will be installed automatically and your computer should now recognize the keyboard.
Can Wireless Keyboards Be Connected to MacBook Pro?
Yes, you can connect any wireless keyboard to a MacBook Pro as long as it is Bluetooth-enabled. To pair the keyboard with your Mac, open up the System Preferences and then select ‘Bluetooth’. From there, you can choose to add a new device and then follow the on-screen instructions to complete the pairing process. Once this is done, you’ll be able to use your wireless keyboard with your MacBook Pro.
Troubleshooting Issues with a Wireless Keyboard
It sounds like there could be several reasons why your wireless keyboard is not working. It could be a combination of low-power batteries, a faulty port or receiver, or interference from other wireless devices. To narrow down the issue, we should first check if the batteries are low and replace them if necessary. Then we should make sure that the receiver is plugged into a working port. Finally, we should check if there are any other wireless devices that may be causing interference with the keyboard.
Resetting Apple Keyboard Pairing
To reset your Apple keyboard pairing, you’ll need to first hold down the Shift and Option keys (‘Alt’ on some keyboards). While holding down these keys, click on the Bluetooth icon in the menu bar. When the menu appears, release the keys. From this menu, select Debug > Remove All Devices. This will remove all of your current device pairings.
Afterward, restart your Mac and then set up your keyboard and/or mouse as normal. You can do this by clicking on the Bluetooth icon again and selecting your device from the list of available devices. If a password is required for pairing, enter it and then click Pair to complete the process.


