Private DNS Mode is an essential feature for anyone concerned about their privacy and security while using their Android phone. By enabling this feature, all DNS queries made by your device will be encrypted, preventing any malicious actors from viewing them, even if they manage to capture the packets. If you value your online privacy, enabling Private DNS Mode should be a top priority.
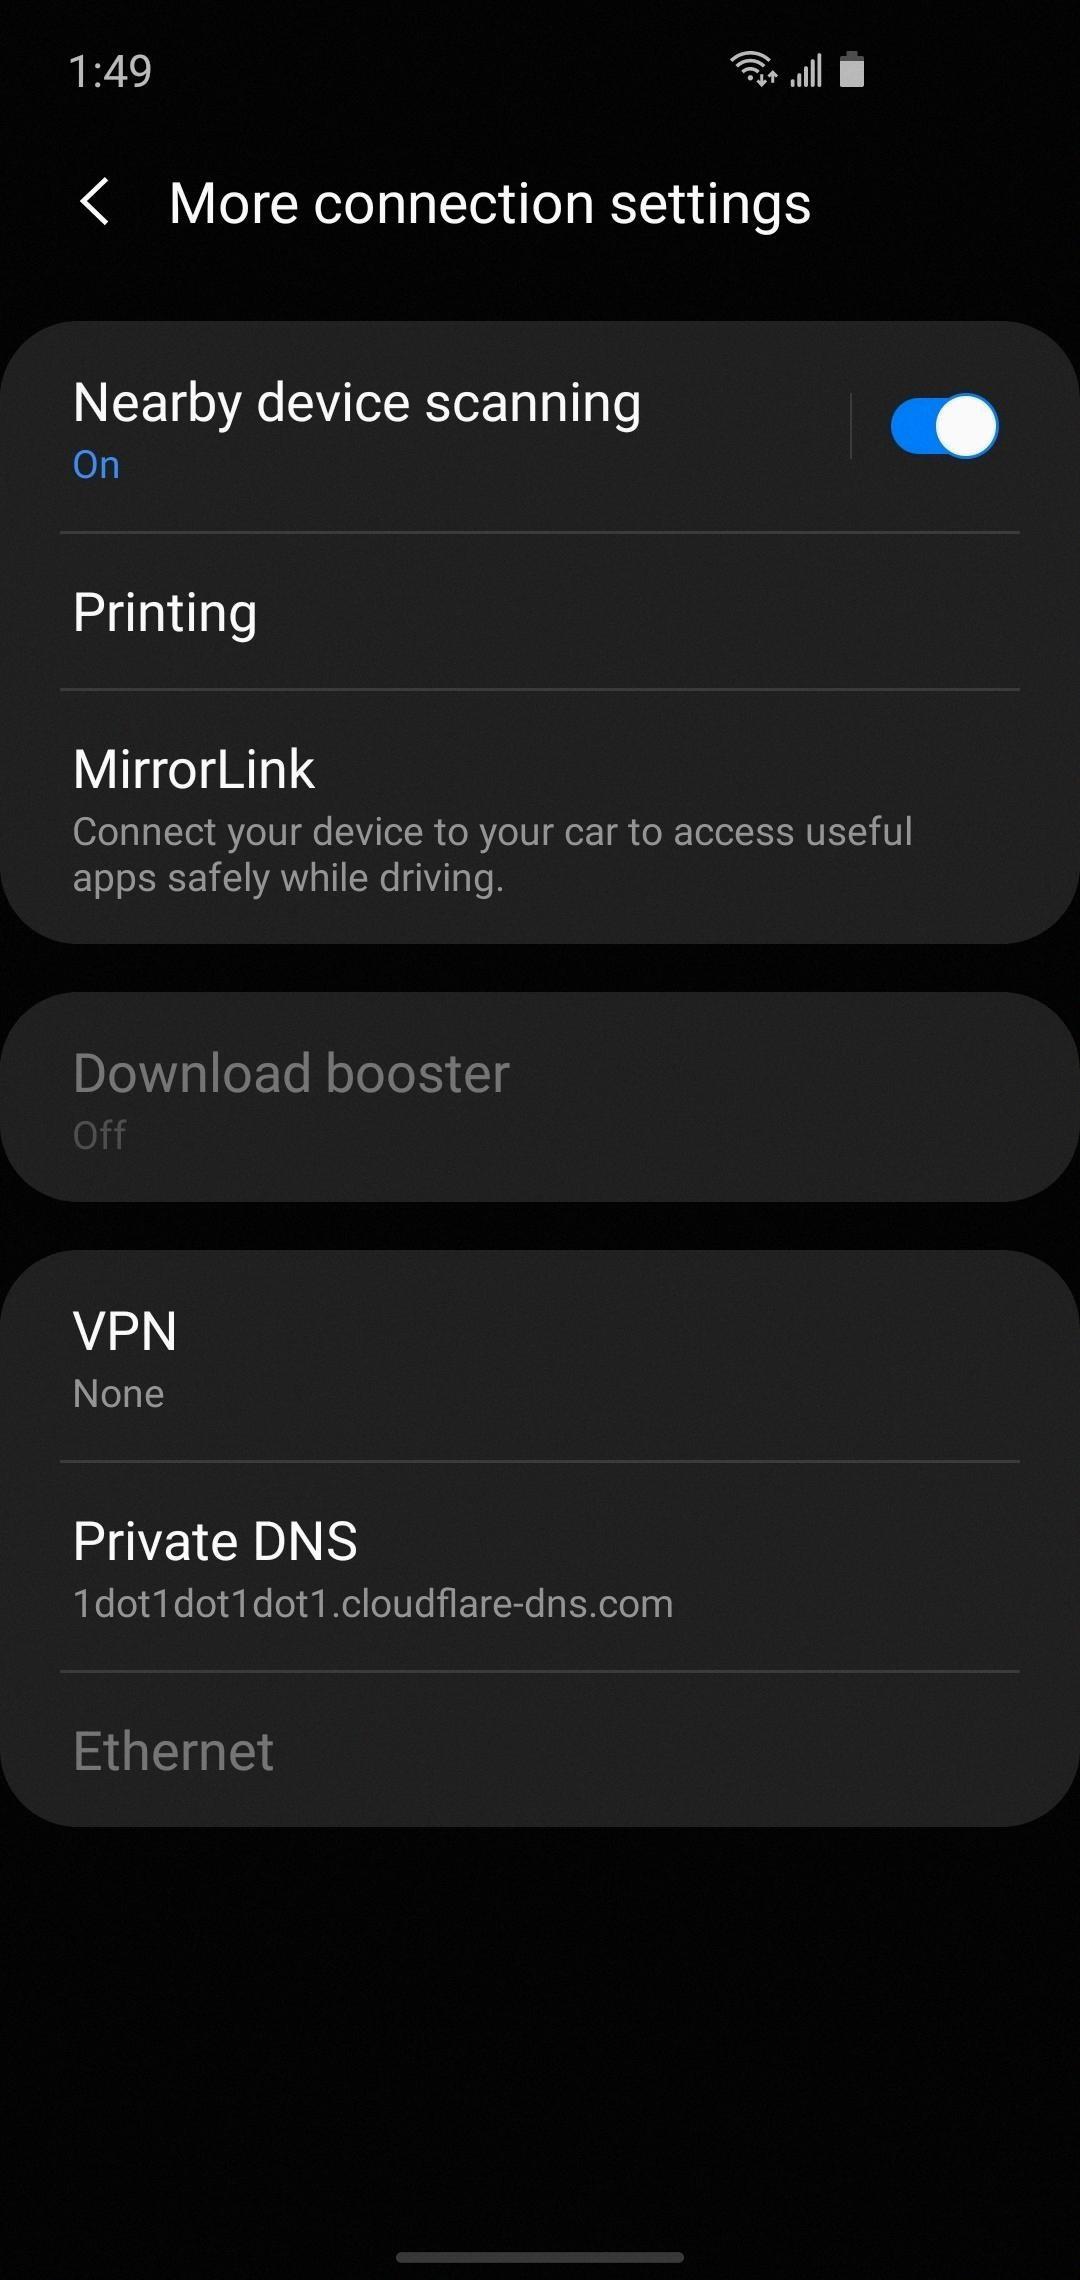
Enabling Private DNS Mode on your Android phone is a simple process. First, go to the Settings menu on your device. From there, navigate to the “Connection & sharing” section. Within this section, you will find an option for “Private DNS.” Tap on this option to access the Private DNS settings.
Once you are in the Private DNS settings, you will be presented with two options: “Automatic” and “Private DNS provider hostname.” The “Automatic” option uses the DNS server provided by your network operator, while the “Private DNS provider hostname” option allows you to specify a custom DNS server of your choice.
To enable Private DNS Mode with a custom DNS server, select the “Private DNS provider hostname” option. Here, you can enter the hostname of your preferred DNS server. You may need to consult with your DNS provider or network administrator to obtain this information. Once you have entered the hostname, tap “Save” to enable Private DNS Mode with your chosen DNS server.
By enabling Private DNS Mode, all DNS queries made by your Android phone will be encrypted and routed through your chosen DNS server. This adds an extra layer of security and privacy to your online activities, as your queries will no longer be visible to anyone attempting to intercept them.
If, for any reason, you wish to disable Private DNS Mode, you can do so by going back to the “Private DNS” settings and selecting the “Off” option. This will revert your device to using the DNS server provided by your network operator.
To check which DNS servers your device is currently using, you can use the Command Prompt on your Windows computer. Open the Command Prompt from the Start menu or by typing “Cmd” into the search bar. Once the Command Prompt is open, type “ipconfig/all” and press Enter. Look for the field labeled “DNS Servers.” The first address listed is the primary DNS server, and the next address is the secondary DNS server.
Enabling Private DNS Mode on your Android phone is a crucial step in safeguarding your online privacy and security. By encrypting your DNS queries and routing them through a trusted DNS server, you can prevent unauthorized access to your browsing data. Take control of your privacy and enable Private DNS Mode today.
Should Private DNS Be On Or Off?
Private DNS should be enabled for better privacy and security on Android devices. By turning on Private DNS Mode, your DNS queries are encrypted, preventing any potential eavesdropping or interception by malicious actors. This ensures that your browsing activity remains private and protected from prying eyes.
To enable Private DNS Mode on Android, follow these steps:
1. Open the Settings app on your Android device.
2. Scroll down and tap on “Network & internet” or a similar option.
3. Look for the “Private DNS” or “DNS over TLS” option and tap on it.
4. Select the “Private DNS provider hostname” option.
5. Enter the hostname of the DNS provider you want to use. Some popular DNS providers that support DNS over TLS include:
– Cloudflare: 1.1.1.1
– Google: dns.google
– Quad9: dns.quad9.net
6. Tap “Save” or “OK” to apply the changes.
Once Private DNS Mode is enabled, all DNS queries made by your device will be encrypted and routed through the specified DNS provider. This helps protect your privacy and prevents unauthorized access to your browsing activity.
It’s worth noting that some internet service providers or network configurations may not be compatible with Private DNS Mode. In such cases, you may experience connectivity issues or need to use a different DNS provider.
Enabling Private DNS Mode on Android is recommended for anyone who values their privacy and wants to enhance their online security.

What Happens If I Turn On Private DNS?
When you turn on the Private DNS feature on your smartphone, several things happen:
1. Encryption of DNS queries: Private DNS ensures that all your DNS queries are encrypted, which means that the data exchanged between your device and the DNS server is protected from eavesdropping or tampering. This enhances your privacy and security while browsing the internet.
2. Use of a chosen DNS server: With Private DNS enabled, you can specify a DNS server of your choice. This allows you to have more control over your internet experience by using a server that aligns with your preferences and needs. You can choose a server that focuses on privacy, security, or even performance.
3. Bypassing ISP DNS: By enabling Private DNS, you can bypass the default DNS server provided by your internet service provider (ISP). This can be useful if you want to avoid any potential DNS filtering or censorship imposed by your ISP.
4. Improved speed and reliability: In some cases, using a private DNS server can result in faster and more reliable DNS resolution. This is because some private DNS servers are optimized for performance and may have better infrastructure compared to the default DNS servers provided by ISPs.
5. Potential compatibility issues: While Private DNS can offer numerous benefits, there can be certain compatibility issues with certain networks or applications. Some networks or apps might not work properly when Private DNS is enabled, as they rely on specific DNS configurations. In such cases, you may need to disable Private DNS temporarily to ensure proper functionality.
Enabling Private DNS on your smartphone enhances your privacy, security, and control over your internet browsing. However, it’s important to be aware of potential compatibility issues and adjust the settings accordingly if needed.
Which DNS Am I Using?
To find out which DNS you are currently using, follow these steps:
1. Go to the Start menu and open the Command Prompt. You can do this by typing “Cmd” into the search bar and selecting the Command Prompt application.
2. Once the Command Prompt window is open, type “ipconfig/all” and press Enter.
3. A list of information will be displayed. Look for the field labeled “DNS Servers.”
4. The first address listed is your primary DNS server, and the next address is your secondary DNS server.
If you are using a dynamic IP address, your DNS server may change periodically. In such cases, the DNS servers listed in the ipconfig/all command output will reflect the current DNS servers being used by your computer.
Conclusion
Enabling Private DNS Mode on your Android device is a crucial step in ensuring your privacy and security while browsing the internet. By encrypting all DNS queries, Private DNS Mode prevents any potential bad actors from intercepting and viewing your browsing activity.
To enable Private DNS Mode on Android, simply go to your device’s Settings, navigate to the Connection & sharing section, and select Private DNS. From there, you can enter the DNS server of your choice, which will then encrypt all DNS queries made by your smartphone.
It’s important to note that Private DNS Mode should be a must-have feature for anyone who values their privacy and wants to protect their sensitive information. By encrypting DNS queries, you can prevent any potential eavesdropping or data interception by hackers or other malicious entities.
If at any point you wish to disable the Private DNS feature, you can easily do so by following the same steps and selecting the option to turn off Private DNS.
Enabling Private DNS Mode on Android is a simple yet effective way to enhance your online privacy and security. By encrypting your DNS queries, you can rest assured that your browsing activity remains private and protected from any potential threats.


