Video editing has become increasingly popular, and with the rise of smartphones, it is now easier than ever to create and edit videos on the go. One popular video editing app for iPhone users is iMovie. In this article, we will explore how to reverse a video in iMovie on your iPhone.
Firstly, let’s discuss the benefits of reversing a video. Reversing a video can add a unique and creative touch to your footage. It can create interesting effects, such as making objects or people appear to move backward. It can also be used to create comedic or dramatic effects, depending on your desired outcome.
To reverse a video in iMovie on your iPhone, you will need to have the iMovie app installed on your device. If you don’t have it, you can download it from the App Store.
Once you have iMovie installed, open the app and select the project that contains the video you want to reverse. If you don’t have a project yet, you can create a new one by tapping the “+” button and selecting “Movie.”
Next, locate the video clip that you want to reverse in the timeline. Tap on the clip to select it, and then tap on the “Modify” button at the bottom of the screen.
In the Modify menu, you will see an option called “Reverse.” Tap on it, and iMovie will automatically reverse the selected clip. You will see a mirror icon appear on the clip to indicate that it has been reversed.
If you want to adjust the speed of the reversed clip, you can do so by tapping on the speed icon at the bottom left corner of the screen. This will bring up a slider that allows you to control the playback speed of the clip. Drag the slider to the left to slow down the clip or to the right to speed it up.
It’s important to note that reversing a video in iMovie will apply the effect to the entire clip. If you only want to reverse a portion of the clip, you can split it into smaller segments by tapping on the clip and selecting “Split” from the menu. Then, you can reverse the specific segment that you want.
In addition to using iMovie, there are also other third-party apps available for reversing videos on your iPhone. One popular option is the Reverse Vid app, which allows you to record a new video or import pre-recorded videos from your library to reverse later.
Reversing a video can add a unique and creative touch to your footage. With the iMovie app on your iPhone, you can easily reverse a video clip and adjust the playback speed to achieve the desired effect. Alternatively, you can explore other third-party apps like Reverse Vid for more advanced video reversing options. So go ahead and unleash your creativity by experimenting with video reversals in iMovie!
How Do You Rewind A Video On IMovie App?
To rewind a video on the iMovie app, follow these steps:
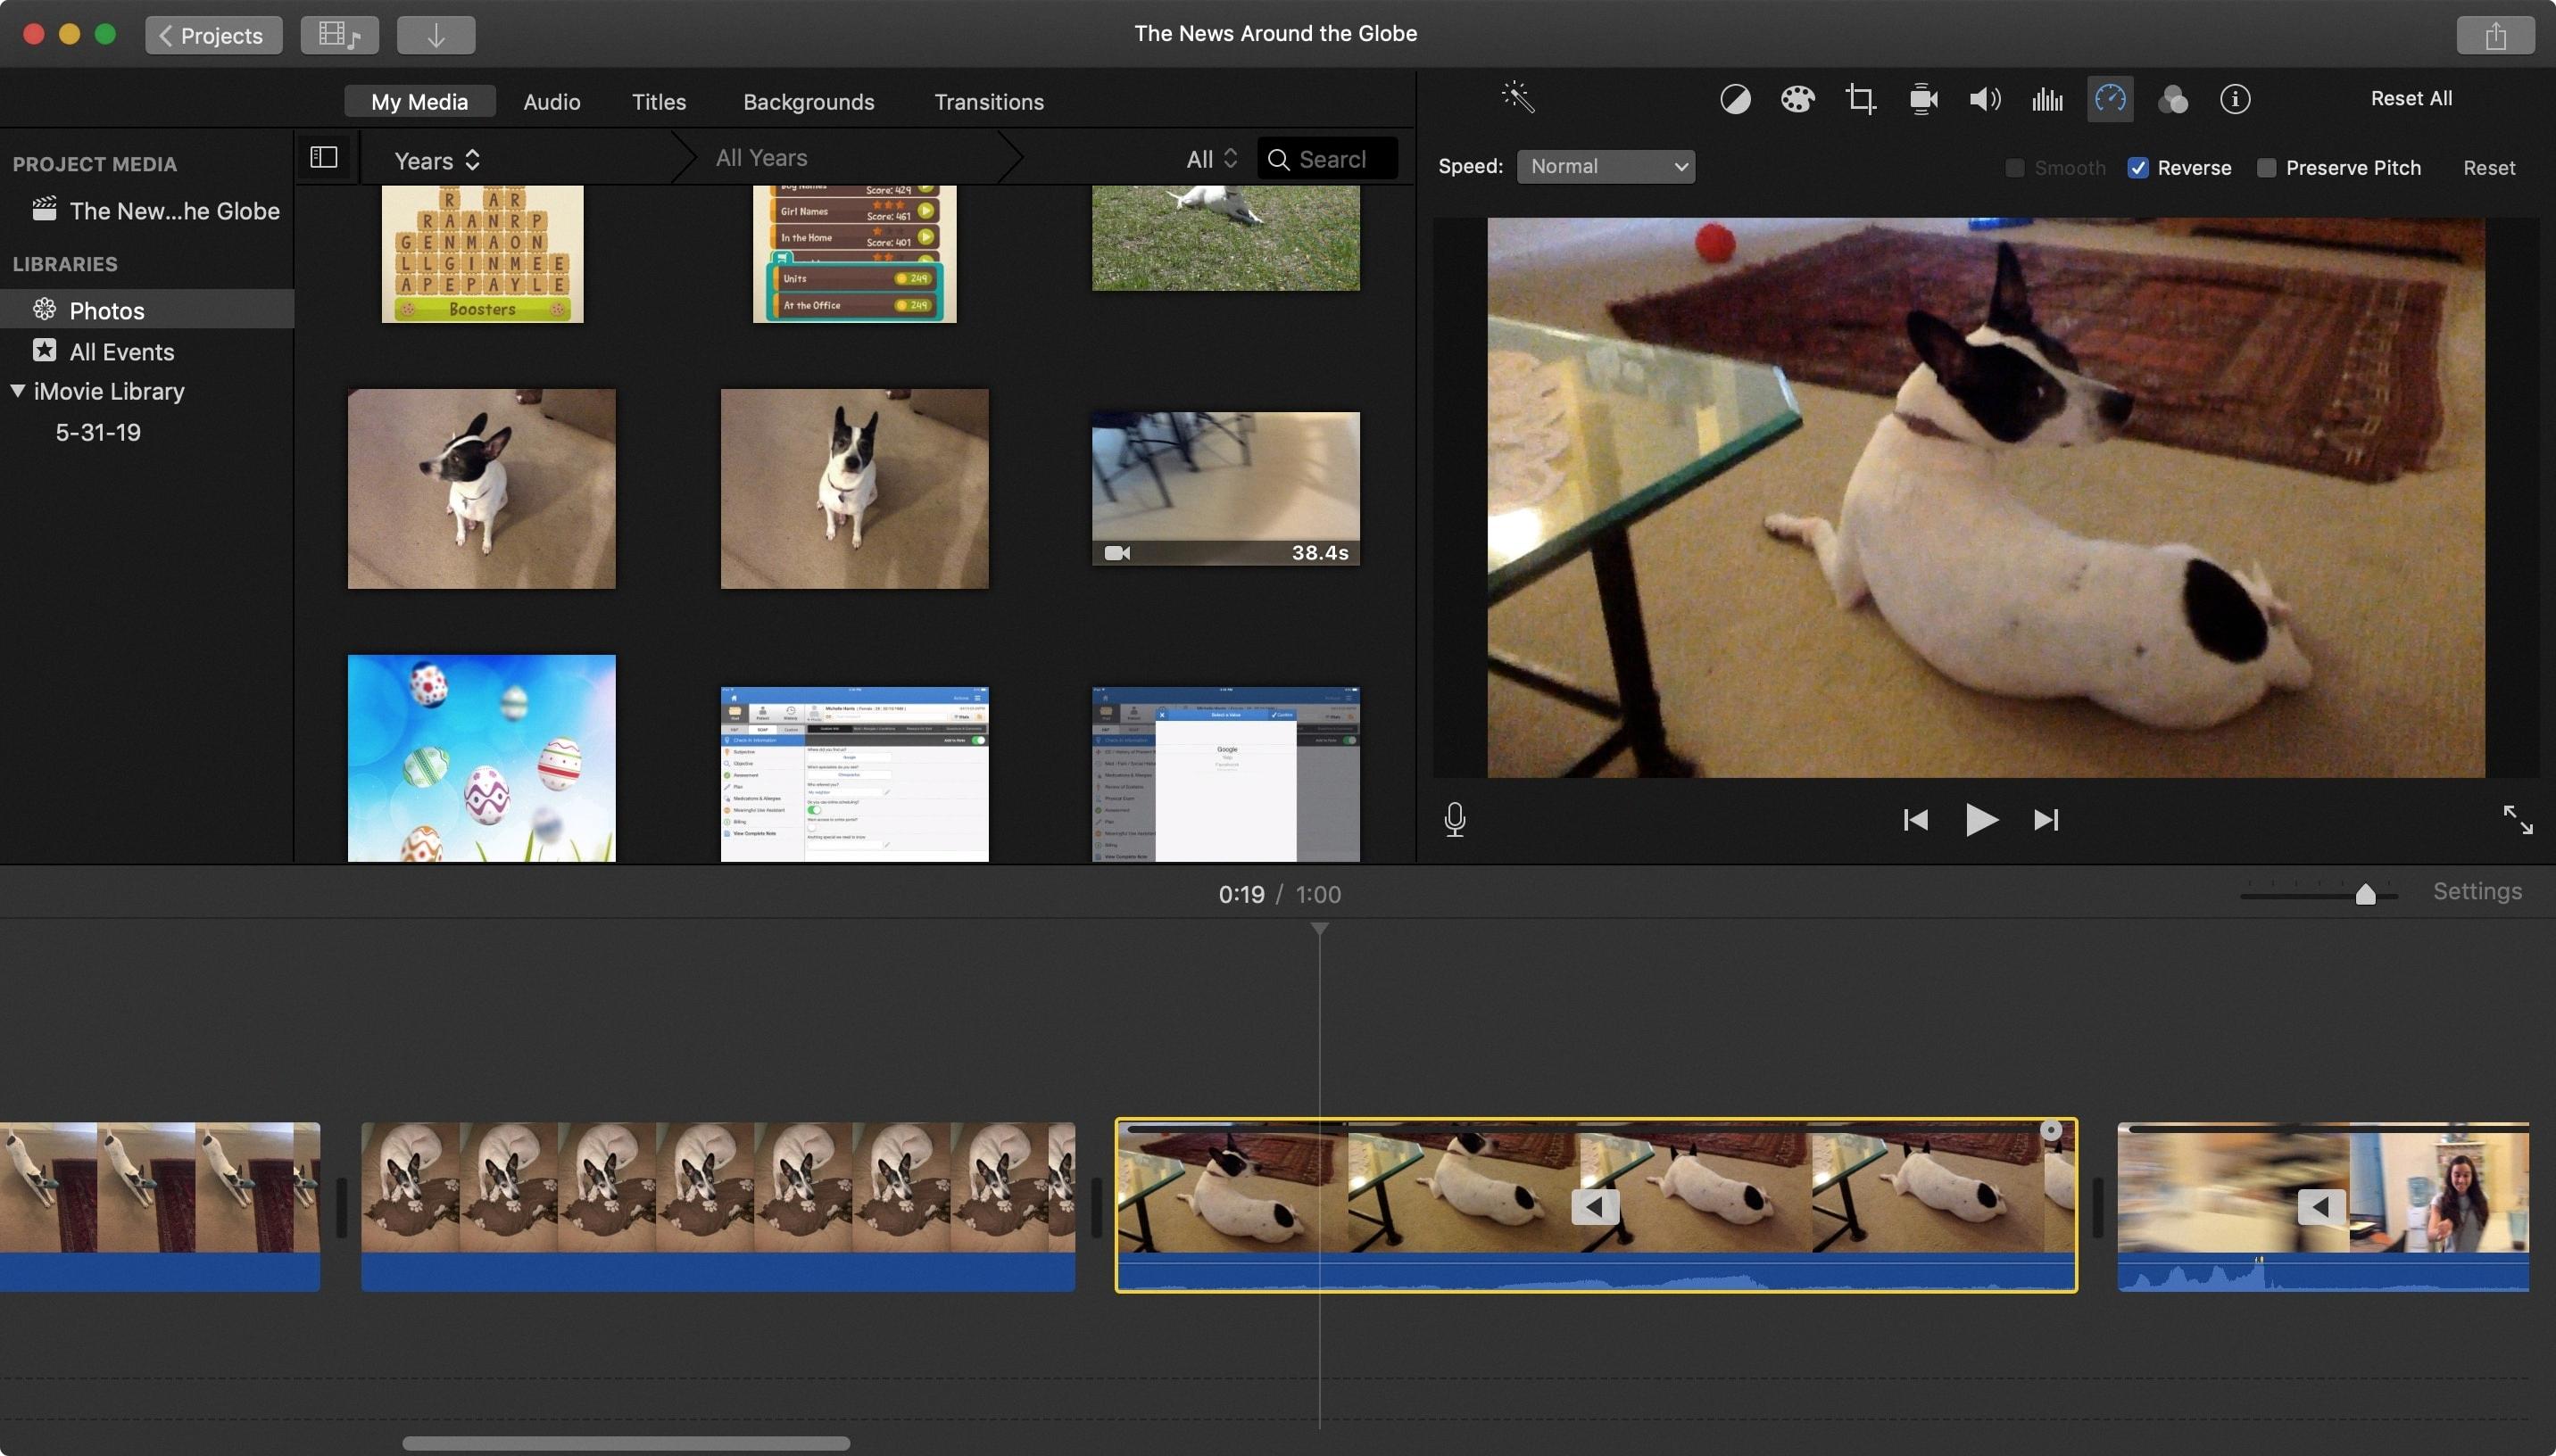
1. Open the iMovie app on your Mac.
2. Locate the clip in the timeline that you want to rewind.
3. Select the clip by clicking on it.
4. In the top menu, click on “Modify.”
5. From the dropdown menu, select “Rewind.”
Once you’ve selected the rewind option, the clip will lengthen in the timeline, and you will see three speed sliders at the top.
To adjust the playback speed of each section, follow these steps:
1. Identify the section you want to adjust the speed for.
2. Locate the corresponding speed slider at the top.
3. Click and drag the speed slider to the left or right to decrease or increase the playback speed, respectively.
You can repeat these steps for each section of the video that you want to rewind or adjust the playback speed for.
In summary, to rewind a video on the iMovie app, select the clip, go to Modify, and choose Rewind. Then, use the speed sliders to adjust the playback speed for different sections of the video.

How Do You Reverse Video Effects On IPhone?
To reverse video effects on an iPhone, you can use the Reverse Vid app available on the App Store. Follow these steps to get started:
1. Open the App Store on your iPhone.
2. Search for “Reverse Vid” in the search bar.
3. Tap on the “Reverse Vid – Video Rewind” app from the search results.
4. Check if your iPhone meets the app’s requirements. It should be running on iOS 12.0 or later versions.
5. Tap on the “Get” or “Download” button to install the app on your iPhone.
6. Once the app is installed, open it from your home screen.
To reverse video effects using Reverse Vid:
1. Upon opening the app, you will have the option to either record a new video or import pre-recorded videos from your video library. Choose the option that suits your needs.
2. If you select the “Record” option, the app will open your iPhone’s camera. Record a new video by tapping on the record button. Once you’re done recording, tap on the stop button.
3. If you choose the “Import” option, the app will present your video library. Select the video you want to reverse from your library.
4. After selecting the video, you will see a preview of it on the app’s interface. To reverse the video, tap on the reverse button, usually represented by a curved arrow pointing backward.
5. The app will process and reverse the video for you. Once the reversal is complete, you can preview the reversed video.
6. If you are satisfied with the reversed video, you can save it to your camera roll by tapping on the save button, usually represented by a down arrow.
7. Alternatively, you may have additional options within the app to edit or further customize the reversed video, such as adding filters, effects, or adjusting playback speed. Explore these options if desired.
By following these steps, you can easily reverse video effects on your iPhone using the Reverse Vid app. Enjoy experimenting with different videos and creating unique reversed effects.
How Do You Make A Video Go Backwards?
To make a video go backwards, you can use the reverse tool in video editing software. Here’s a step-by-step guide on how to accomplish this:
1. Open your preferred video editing software on your computer.
2. Import the video file you want to reverse into the software.
3. Locate the clip in the timeline or video track where you want to apply the reverse effect.
4. Look for the “Clip properties” or “Effects” panel in your software’s control panel. This is usually located on the right side of the screen.
5. Click on the clip you want to reverse to select it.
6. In the “Clip properties” or “Effects” panel, search for the “Reverse” option. It may be listed under the “Transform” or “Video Effects” category.
7. Click on the “Reverse” option to apply the effect to the selected clip.
8. Once the reverse effect is applied, you will notice a mirror or flip icon appear on the clip in the timeline or video track. This indicates that the clip has been reversed.
9. Preview the video to ensure the reverse effect is applied correctly. You can play the video in the software’s preview window.
10. If you are satisfied with the reversed video, you can proceed to save or export it in your desired format.
To summarize, to make a video go backwards, import the video into video editing software, select the clip, apply the reverse effect from the “Clip properties” or “Effects” panel, and preview the video to ensure the effect is applied correctly.
Conclusion
Reversing videos can be done using various methods depending on the device and software being used. On a Mac using the iMovie app, you can select a clip in the timeline and choose the “Rewind” option under the “Modify” menu. This will lengthen the clip in the timeline and allow you to adjust the playback speed using the speed sliders.
Alternatively, you can use the Reverse Vid app on iOS devices to record a new video or import a pre-recorded video from your library. This app provides a simple and user-friendly interface for reversing videos, allowing you to easily create unique and interesting content.
Reversing videos can add a fun and creative element to your projects, allowing you to showcase scenes in a unique and unexpected way. Whether you’re looking to create a comedic effect, highlight a particular moment, or simply experiment with different visual styles, reversing videos can be a valuable tool in your video editing repertoire.
The ability to reverse videos opens up a world of possibilities for content creators, allowing them to explore new ways of storytelling and engage their audience in a fresh and innovative manner. So go ahead and give it a try, and let your creativity flow as you experiment with reversing videos.


