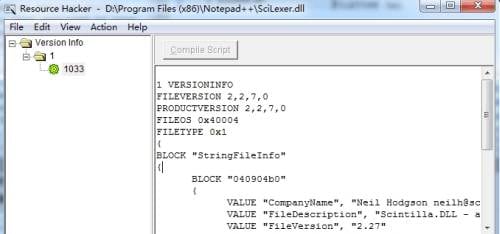
DLL files play a crucial role in the functioning of various software programs. However, when a DLL file malfunctions, it can cause issues and disrupt the smooth operation of the associated program. In such cases, editing the DLL file may be necessary to resolve the problem. This article will provide a detailed guide on how to edit a DLL file effectively.
To begin with, it is important to understand that editing a DLL file involves modifying its original source code. The source code is the underlying programming instructions that were used to create the DLL file. This code is typically stored in a separate file, distinct from the DLL file itself.
To edit a DLL file, you will need access to the original source code. If you do not have the source code, you may need to contact the developer or obtain it from a reliable source. Once you have the source code, follow these steps:
Step 1: Install a decompiler program
There are several decompiler programs available that can assist in the process of editing a DLL file. Some popular options include Reflector and ILSpy. Choose a decompiler program that suits your needs and install it on your computer.
Step 2: Open the DLL file in the decompiler
Launch the decompiler program and open the DLL file that you want to edit. The decompiler will analyze the DLL file and convert it into a readable format, such as C# or VB.NET source code.
Step 3: Use the “Assembly Explorer” to browse the DLL file
Within the decompiler program, navigate to the “Assembly Explorer” or a similar feature that allows you to explore the contents of the DLL file. This feature will display the various components and functions within the DLL file.
Step 4: Double-click on a node to view the code
To edit a specific component or function within the DLL file, double-click on the corresponding node in the “Assembly Explorer.” This will open the source code associated with that particular component.
Step 5: Make necessary edits
Once you have opened the source code, you can make the desired edits. Ensure that you are familiar with the programming language used in the source code to avoid introducing errors. Carefully modify the code according to your requirements.
Step 6: Save the edited code
After making the necessary edits, save the modified code as a new file. This new file will contain your edited version of the source code.
Step 7: Compile the new DLL file
Using a compatible development environment, compile the edited source code into a new DLL file. This process may vary depending on the programming language and tools being used. Consult the documentation or resources specific to your development environment for guidance on compiling the DLL file.
Step 8: Replace the original DLL file
Once the new DLL file has been successfully compiled, replace the original malfunctioning DLL file with the edited version. Ensure that you backup the original DLL file before making any changes to avoid irreversible damage.
By following these steps, you can effectively edit a DLL file and resolve any issues that may be affecting the associated software program. However, it is important to note that DLL editing should be approached with caution, as any mistakes or incorrect modifications can lead to further problems. Always backup your files and seek professional assistance if needed.
Editing a DLL file requires access to the original source code, a decompiler program, and a compatible development environment. By carefully following the steps outlined in this guide, you can successfully edit a DLL file and address any issues that may arise.

How to Modify DLL Files?
Modifying DLL files involves editing the original source code from which the DLL file was created. Here are the steps you can follow to modify a DLL file:
1. Obtain the original source code: To modify a DLL file, you will need access to the original source code from which the DLL was compiled. This source code is typically written in a programming language such as C++, C#, or Visual Basic.
2. Set up the development environment: Install the necessary software and tools required to edit and compile the source code. This may include an integrated development environment (IDE), compiler, and any additional libraries or dependencies.
3. Make the necessary modifications: Open the source code file in your chosen IDE and locate the section of code that needs to be modified. This could involve fixing bugs, adding new functionality, or making improvements to the existing code.
4. Test the modifications: After making the necessary changes to the source code, it is important to test the modified code to ensure it functions correctly. This involves compiling the modified code and running it to verify that the desired changes have been implemented successfully.
5. Compile the modified code into a new DLL file: Once the modifications have been tested and verified, you will need to compile the modified source code into a new DLL file. This process will vary depending on the programming language and development environment you are using.
6. Replace the original DLL file: Once the new DLL file has been compiled, you can replace the original DLL file with the modified version. It is recommended to keep a backup of the original DLL file in case any issues arise.
7. Test the modified DLL file: After replacing the original DLL file, test the modified DLL in the relevant application or system to ensure that it functions as intended and that the desired modifications have been successfully implemented.
It is important to note that modifying DLL files should be done with caution and only by individuals with a good understanding of programming and software development. Improper modifications can lead to compatibility issues or cause the DLL file to become unusable.
Can a DLL Be Decompiled?
It is indeed possible to decompile DLL (Dynamic Link Library) files. Decompilation is the process of converting machine-executable code back into human-readable source code. However, it is important to note that the decompiled code may not be an exact replica of the original source code used to create the DLL.
When a DLL file is compiled, the source code is transformed into machine code that can be executed by the computer. This machine code is not directly understandable by humans. Decompilation reverses this process by attempting to reconstruct the original source code from the machine code.
There are various tools and techniques available for decompiling DLL files, although the specific method may depend on the programming language and tools used to create the DLL. Decompiling a DLL can be a complex and time-consuming task, as the decompiler needs to analyze the machine code and make assumptions about the original source code structure.
It is important to mention that decompiling a DLL may not always yield the exact source code used to create it. Certain optimizations, obfuscation techniques, or other protective measures implemented during the compilation process can make the decompiled code less readable or even incomplete. Additionally, if the DLL contains any proprietary or copyrighted code, decompiling it may be illegal or against the terms of use.
While it is possible to decompile DLL files, the resulting source code may not be an exact replica of the original. Decompiling should only be done for legitimate purposes and in compliance with applicable laws and regulations.
How to Convert DLL File to Readable?
To convert a DLL file into a readable format, you can utilize a decompiler tool. Decompilers help reverse engineer compiled code, such as DLL files, to convert them back into a format that is easier to understand and modify. Here are the steps to convert a DLL file to a readable format:
1. Choose a decompiler tool: There are several decompiler tools available, such as Reflector and ILSpy. Select a tool that suits your requirements and download it from a reliable source.
2. Install the decompiler tool: Follow the installation instructions provided by the tool’s website or documentation. Ensure that you download the appropriate version of the decompiler for your operating system.
3. Open the decompiler: Launch the decompiler tool on your computer. Most decompilers have a user-friendly interface that allows you to navigate through the decompilation process.
4. Load the DLL file: Within the decompiler, locate the option to load a file or open a DLL. Use this option to select the DLL file you want to convert. The decompiler will then analyze and decompile the DLL file.
5. View the decompiled code: Once the decompilation process is complete, the decompiler will display the decompiled code in a readable format. This code will be similar to the original source code from which the DLL was compiled.
6. Save the decompiled code: In most decompilers, you will have an option to save the decompiled code as a text file. Use this option to save the code in a location of your choice on your computer.
7. Review and edit the code: Open the saved text file containing the decompiled code in a text editor or an integrated development environment (IDE) of your choice. This will allow you to review and make any necessary modifications to the code.
8. Understand the limitations: Keep in mind that decompilation may not always result in perfect source code reproduction. The decompiled code may not be as clean or organized as the original source code, and some parts may be difficult to understand. Additionally, decompilation might not be legal in all cases, so ensure that you have the necessary permissions and rights to decompile the DLL file.
By following these steps, you can convert a DLL file into a readable format using a decompiler tool. This will allow you to analyze, modify, or learn from the code within the DLL file.
How Do You View the Contents of a DLL?
To view the contents of a DLL (Dynamic Link Library) file, you can follow these steps:
1. Find and install a decompiler program: Look for a suitable decompiler program online and download/install it on your computer. Some popular options include dotPeek, ILSpy, and JustDecompile.
2. Open the DLL files in the decompiler: Launch the decompiler program and locate the DLL file you want to view. Most decompilers allow you to open DLL files directly from their interface.
3. Use the “Assembly Explorer” feature: Once the DLL file is loaded in the decompiler, you will typically see an “Assembly Explorer” or a similar option. Click on it to browse the contents of the DLL.
4. Browse the DLL contents: The “Assembly Explorer” will display a hierarchical structure representing the different components and code within the DLL. It may consist of namespaces, classes, methods, properties, and other elements.
5. Double-click to view the code: To view the code contained within a specific component, double-click on the corresponding node in the “Assembly Explorer.” This will open a new window or tab showing the code in a readable format.
By following these steps, you can effectively use a decompiler to view and explore the contents of a DLL file. Please note that decompiling and modifying DLL files may have legal implications, so ensure you have the necessary rights and permissions before proceeding.
Conclusion
If you need to edit a DLL file that is not functioning correctly, you can do so by accessing the original source code used to create the DLL file. This source code will be in a separate code file. By making changes to the source code, you can create a new DLL file that can potentially replace the malfunctioning one.
While it is possible to decompile DLL files to access the source code, the process is not straightforward and may not result in an exact replica of the original source code. Decompiler tools such as Reflector and ILSpy can be used to convert the DLL file into a readable format, such as C# or VB.NET source code. This source code can then be saved as a text file for editing purposes.
It is important to note that editing a DLL file requires a strong understanding of programming languages and the specific code used in the file. Making incorrect changes to the source code can lead to further issues or even render the DLL file unusable. Therefore, it is recommended to proceed with caution and seek assistance from a knowledgeable professional if needed.
Editing a DLL file involves accessing the original source code, either through the code file or by decompiling the DLL file. By making careful and knowledgeable changes to the source code, a new DLL file can be created to replace the malfunctioning one.


